Ever walked past a tidy flower bed and thought, “How do they keep that border so crisp?” Edging is the unsung hero of garden design—simple, yet it makes everything pop. When my daughter Esme started planting pansies, suddenly, the mess where grass crept into the mulch drove her nuts. Been there, right? Flower bed edging isn’t just about style; it’s about sanity, keeping mulch where it belongs, and giving your yard a polished, deliberate look—without hours of fussing every weekend.
Why Should You Edge Your Flower Beds?
It’s crazy how much of a difference a sharp edge makes—like lining up dominoes, suddenly the whole garden clicks together. The obvious perk is stopping grass and weeds from sneaking into your beds. That means you’re spending less Saturday elbow-deep in dandelions. Edging also stops mulch from wandering onto the lawn with the next rainstorm or when the kids play catch a little close to the petunias.
Edging acts like a visual cue—here’s the flower bed, there’s the lawn—and helps guide the eye, kind of like a picture frame. It also protects delicate plants from the terror of the lawnmower blade. If you’ve ever heard the whack of a blade hitting bricks, you know a good edge can save you from some repair bills. And since we all like making things easier, the right edge makes trimming and mowing way simpler. Just zip along the boundary—no fancy moves or fuss.
But let’s not forget curb appeal. The National Association of Realtors has suggested a neat landscape can add substantial value to your home—sometimes by 10% or more. That’s real money for just putting in a bit of DIY sweat or making a small investment in materials.
Popular Edging Materials—and How They Stack Up
So, you want that crisp line—but what are your options? Here’s where things get interesting.
- Metal Edging: Sleek, minimal, and long-lasting, metal gives you a razor-sharp line you’d struggle to get with anything else. Usually steel, sometimes aluminum, it flexes into curves and stands up to abuse. But it does get hot in full sun and needs to be hammered in securely. You want at least 1/8 inch thick for staying power.
- Plastic or Rubber Edging: Cheap, flexible, light to haul home, and easy to cut to size. These snap or overlap together and are a go-to for quick fixes. Some are made from recycled tires. But they can fade, get brittle over a few years, or pop out with a heavy freeze.
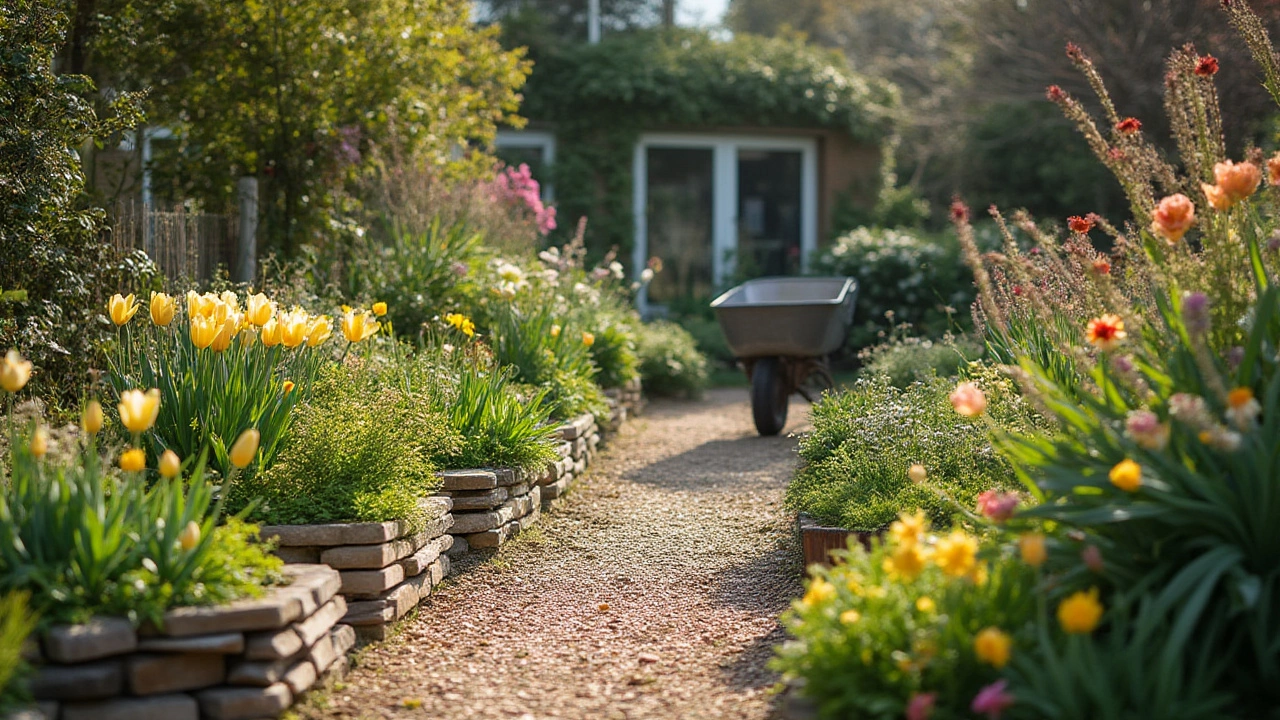
- Brick and Stone: Classic and indestructible. Lay bricks flat for a casual look, or stand them up for a raised border. Natural stone adds rustic charm—think slate, granite, or river rock. Some folks build small walls just a few bricks high. The catch? It takes some digging and leveling, and if your kids like kicking soccer balls, the blocks can shift.
- Concrete Edging: Poured in place or bought as precast blocks, concrete gives a super clean appearance and won’t rot, rust, or invite termites. Some even have color or texture to mimic stone at a lower price. Watch out for cracks in freeze-thaw climates.
- Wood Edging: Timbers, railroad ties, or even standard garden stakes pounded in end to end. Wood warms up a formal bed and comes in a dozen styles. Use cedar or redwood for rot resistance, or pressure-treated wood for budget jobs. Wood will eventually break down, so set it with a gravel base to keep it off the wet earth.
- Living Edges: Here’s a twist: plant a line of low-growing herbs or succulents instead of using hard borders. It’s bio-edging, and some, like lavender or mondo grass, look great and repel pests too. The downside? You’ll still need to trim and weed—but it’s a softer look.
Take a peek at this table for a bird’s-eye comparison:
| Material | Durability (years) | Avg. Cost (per 10ft) | DIY-friendly | Maintenance |
|---|---|---|---|---|
| Metal (Steel/Alum.) | 25-40 | $30-50 | Medium | Low |
| Plastic/Rubber | 3-10 | $15-30 | High | Low |
| Brick/Stone | 20-50 | $40-80 | Low-Medium | Medium |
| Concrete | 30-60 | $25-60 | Low-Medium | Low |
| Wood | 5-15 | $20-35 | Medium | Medium |
| Living Edges | Depends | $5-30 | High | High |
If you’re looking to try something creative, some folks use glass bottles (bottoms up in the soil), upcycled tiles, or even woven willow branches for a cottage vibe.
DIY Edging Install—What’s Actually Involved?
Sizing up a border project sounds intimidating, but trust me, you don’t need a landscape architecture degree—or even a lot of tools—to get pro results. My son Marlon and I have laid brick edges with nothing more than a flat spade, tape measure, and a bag of sand.
Here’s a step-by-step for the classic digging edge, which works for almost any material:
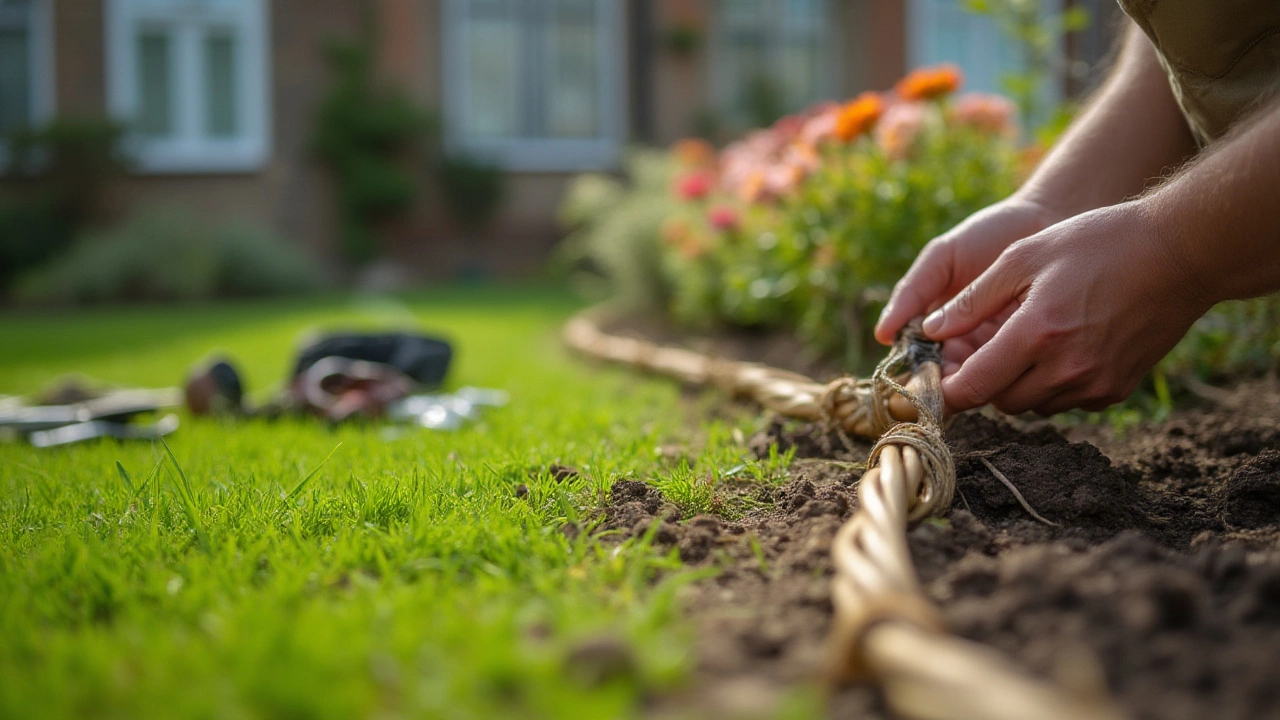
- Mark Your Line: Run a garden hose or marking string to lay out the bed curve. If you want straight lines, try out a taut string staked at both ends.
- Dig a Trench: About 4-6 inches deep, as wide as your material. Slope one side for a neater look.
- Add Base Material: If setting bricks or stone, dump in an inch or two of sand or gravel. This keeps things level and helps with drainage.
- Place Your Edge: Fit bricks, metal, or wood into the trench. For living edges, plant your row neatly at the base.
- Backfill and Tamp Down: Fill dirt around the exposed sides and press everything firmly in place. Check the line as you go so you don’t end up with a wonky border.
- Water and Mulch: For living edges, give new plants a healthy soak. For others, mulch up to the border for a tidy finish.
The trick isn’t muscle—it’s patience. Check level every few feet. If you’re going around a tree, give roots room and work gently. For bricked or stoned edges, a little play sand between the cracks tightens it all up and keeps weeds out.
Matching Edging Style to Your Garden’s Look
Picking an edge is kind of like picking shoes. Are you going for sleek, rugged, colorful, or low-key? Modern gardens vibe with metal or poured concrete—crisp, clean, and minimalist. Cottage gardens want something warm and a little quirky, so wood or brick works great. Edible gardens can go full-on rustic with log slices or old terra cotta pipes.
If you’ve got kids (like I do), aim for softer, rounded edges near play zones—you don’t want skinned knees or scraped elbows. In shady gardens, slip-resistant stone is smart; in sunny, dry spots, lighter stone or metal won’t get as hot for bare feet.
Here’s a thought from the American Society of Landscape Architects:
“Edging helps turn a chaotic planting into a statement. The most memorable gardens don’t just grow—they’re edited by a gardener’s hand.”
Try breaking up long, straight beds into gentle curves for visual interest, or even use sections of different material for a mosaic look. That little creative touch will impress your neighbors far more than any big investment in rare plants.
Common Edging Mistakes and How To Dodge Them
People usually run into a few classic problems. First, they pick the wrong height—the edge should stand 1-2 inches above the ground. More than that, you’ll be tripping, and less, the grass is just going to roll right over it. Don’t forget about drainage: if your borders don’t let water run off, roots can rot and beds will look soggy fast.
Another trip-up is not prepping the base. Many folks lay stone right on soil, then winter heave or moles leave half the edge tipping every which way. Use sand or gravel under anything heavy for better stability.
Straight lines are easy to plan but can draw the eye to every tiny flaw in the yard. A few gentle curves make borders more forgiving—and feel more welcoming, too. Also, skip glue or harsh sealants on stone or brick; these can trap water and make things crack in cold weather. Let borders "float" and adjust as the seasons change.
Plastic and rubber options may tempt you if you’re short on time. Just remember to stake them in deeply and overlap joints to avoid shifting and pop-outs. With wood, regular treatment with linseed oil or a non-toxic sealant can stretch out their life by years.
One last pro tip: don’t overdo it! Subtlety wins in edging. The bed should be the star—the edge just supports it. If you’ve ever seen a flower bed with neon blue plastic trim, you’ll know what I mean.
Maintenance Tips for Pristine Edges
The big draw of a crisp edge is cutting down on back-breaking work. But nothing in the garden is “done” forever. For stone and brick, check the border every spring for frost heave, and nudge blocks back into place. For wood, dab on more protective oil every couple of years, and keep mulch from touching the lumber directly to ward off rot.
Plastic and metal borders should get a once-a-year inspection to look for broken stakes, faded colors, or places where mulch might have piled a bit too high. With living edges, regular trims with hand shears or string trimmers keep those lines sharp, and pull out aggressive plants or weeds before they get comfy in the border.
Trust me—ten minutes in spring and fall on edging beats hours fighting crabgrass later. The reward? Every time you step outside, your beds look professional.
Here’s a solid piece of advice from horticulturist Barbara Damrosch:
“A good garden edge doesn’t just last; it gets better every season. Mother Nature loves a bit of order, too.”
In the end, flower bed edging isn’t just a border—it’s a tool, a frame, and a statement. Pick the style that works for your life (and your soil), put in the work once, and enjoy a garden that looks finished all year.