Artificial Grass Sub Base Calculator
Enter dimensions and select usage to see recommendations.
You’ve picked the perfect shade of green. You’ve measured the garden. You’re ready to lay that lush, low-maintenance turf. But here’s the trap most DIYers fall into: they treat the ground underneath as an afterthought. They slap down a thin layer of sand or just compact the existing soil, and within six months, the lawn looks like a cratered moonscape or worse-it holds water like a swimming pool.
The sub base is the backbone of your artificial grass installation. It’s not just filler; it’s the engineering solution that dictates how long your lawn lasts and how well it drains. If you get this wrong, no amount of premium turf will save you. So, what actually works best? Is it crushed stone? Sand? Concrete? Let’s break down the options based on real-world performance, not just manufacturer brochures.
Why the Sub Base Matters More Than the Grass
Think of your artificial lawn like a road. You wouldn’t drive a car on loose dirt, right? The same logic applies here. The sub base serves three critical jobs: stability, drainage, and frost resistance. In the UK, where we deal with everything from heavy rain to occasional hard frosts, getting this layer right is non-negotiable.
If the base shifts, the grass wrinkles. If the base doesn’t drain, you get puddles that turn into algae farms in winter. And if the base isn’t deep enough, frost heave will push your lawn up in spring, creating ugly bumps. The goal is a solid, permeable foundation that locks the turf in place while letting water escape quickly.
The Gold Standard: MOT Type 1 Crushed Stone
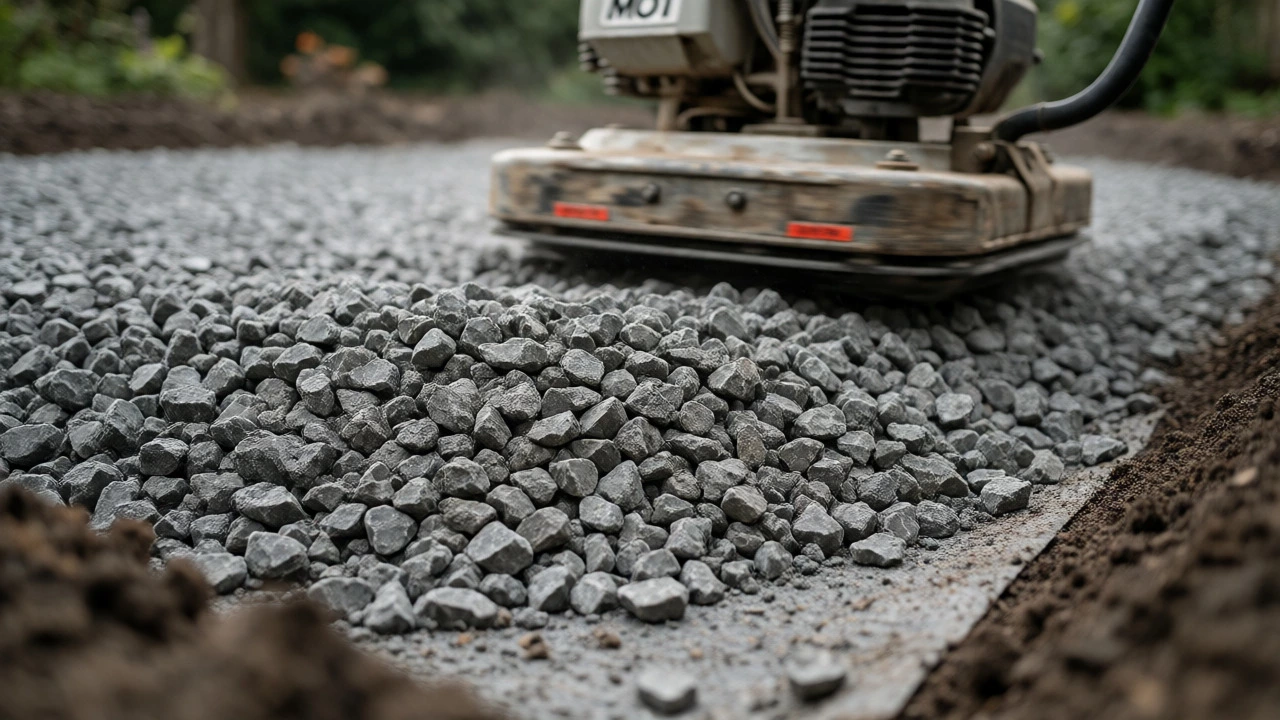
For most residential gardens, MOT Type 1 is the industry standard and arguably the best choice for general use. This is a graded aggregate, usually made from recycled concrete or natural rock, mixed with fine dust. Why do installers love it? Because it compacts incredibly well.
When you run a plate compactor over MOT Type 1, the angular stones lock together, creating a rigid surface that resists movement. Unlike round gravel, which rolls around under pressure, these sharp edges bite into each other. Plus, it’s permeable. Water passes through the gaps between the stones, preventing saturation.
- Depth: Aim for 75mm-100mm (3-4 inches) after compaction.
- Cost: Very affordable, often cheaper than buying new materials because it’s frequently recycled.
- Workability: Easy to level and screed flat.
One caveat: ensure you buy "clean" MOT Type 1. Some cheap variants have too much clay content, which can become slippery when wet and slow down drainage. Check with your local supplier-they’ll know which batch is best for landscaping.
The Premium Option: Decomposed Granite or Sharp Sand
Some high-end landscapers prefer decomposed granite or a mix of sharp sand and cement for a smoother finish. This method is popular in commercial settings or luxury domestic projects where a flawless, carpet-like appearance is required.
Decomposed granite creates a very dense, almost concrete-like surface once compacted. It offers superior stability but requires more skill to install. If you mess up the leveling, it’s harder to fix later compared to crushed stone. Also, it’s generally more expensive per tonne.
Sharp sand alone? Avoid it as a primary base. It’s too loose. It needs to be mixed with something binding, like a small percentage of cement, or used only as a top dressing layer (about 25mm) over a crushed stone base. Pure sand bases tend to wash away during heavy storms unless heavily constrained by edging.
What About Concrete?
People often ask, "Can I just pour a concrete slab?" Technically, yes. But should you? Rarely.
Concrete is impermeable. Unless you drill hundreds of drainage holes (which is tedious and prone to clogging), water has nowhere to go. It pools on top, leading to moss growth and a soggy mess. Furthermore, concrete cracks. Once it cracks, those lines telegraph through your artificial grass, creating visible ridges. It’s also expensive and labor-intensive to remove if you ever want to change your mind.
There is one exception: patios or areas with extremely poor drainage where you’re installing a raised system. But for a standard lawn replacement? Skip the concrete mixer.
Comparing Your Options
Not sure which material fits your budget and project size? Here’s a quick breakdown to help you decide.
| Material | Drainage | Stability | Cost | Best For |
|---|---|---|---|---|
| MOT Type 1 | Excellent | High | $ | Most residential lawns |
| Crushed Stone (Granite) | Good | Medium-High | $$ | Areas with rocky soil |
| Sharp Sand + Cement | Fair | Very High | $$$ | Luxury finishes, small areas |
| Concrete | Poor (unless drilled) | Maximum | $$$$ | Patios, heavy traffic zones |
| Existing Soil | Variable | Low | Free | Budget projects, temporary setups |
Step-by-Step: Preparing the Perfect Base
Choosing the material is half the battle. Installing it correctly is the other half. Here’s the process that ensures longevity.
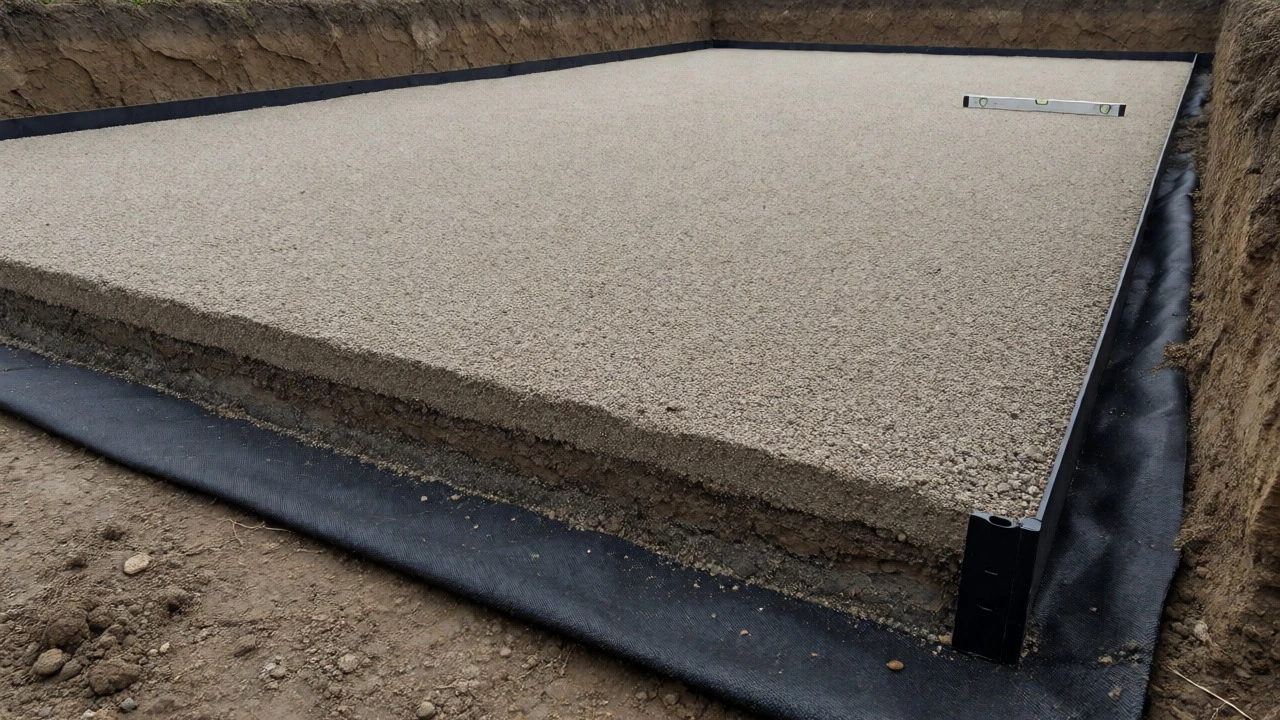
- Excavate: Dig out the area to a depth of at least 100mm (4 inches). Remove all roots, rocks, and debris. If you leave tree roots, they’ll rot and create voids.
- Install Edging: Put in your perimeter boards or plastic edging before adding the base. This contains the aggregate and gives the grass a clean edge to tuck under.
- Lay Geotextile Membrane: Roll out a weed-suppressant membrane directly on the soil. This stops weeds from poking through and keeps the soil separate from the stone.
- Add Aggregate: Pour your MOT Type 1 in layers. Don’t dump it all at once. Add 50mm, then compact it. Then add another 25mm and compact again.
- Screed Flat: Use a straight board and two rails to scrape the surface perfectly flat. Check for falls-aim for a slight gradient (1:80) away from buildings to encourage runoff.
- Final Compaction: Run the plate compactor over the finished surface. It should feel rock-solid. Walk on it; if your footprints sink deeply, it needs more compaction.
Common Pitfalls to Avoid
I’ve seen plenty of failed installations. The most common mistake is under-compacting. People think, "It looks flat," so they stop. But air pockets remain, and over time, gravity and weight cause settling. Always over-compensate on compaction.
Another error is ignoring drainage gradients. Even the best aggregate won’t drain if the water flows toward your house wall. Use a spirit level to check the slope. If your garden is completely flat, you might need to create a subtle crown in the middle to direct water outward.
Finally, don’t skip the geotextile membrane. Yes, it costs extra. But pulling weeds through synthetic turf is a nightmare. The membrane is cheap insurance against back-breaking maintenance.
Regional Considerations for the UK
Living in Brighton, I deal with coastal winds and damp winters. In wetter climates, prioritize drainage over absolute smoothness. A slightly rougher surface that drains fast beats a smooth one that stays wet. In drier regions, you might get away with a thinner base, but never skimp on the compaction.
Also, consider the load. If you’re putting furniture on your artificial lawn, or if it’s a play area for kids, go deeper. 100mm is safe for light use; 150mm is better for heavy traffic. Remember, digging is hard work, but re-doing a failed lawn is harder.
Frequently Asked Questions
Can I lay artificial grass directly on soil?
You can, but it’s risky. Soil shifts with moisture changes, causing the grass to wrinkle or dip. Without a proper sub base, you also lose drainage efficiency, leading to puddles. Direct laying is only recommended for temporary setups or very low-budget projects where aesthetics aren’t critical.
How thick should the sub base be?
For standard residential lawns, aim for 75mm to 100mm of compacted aggregate. This allows enough room for the turf pile height (usually 30-40mm) and ensures structural integrity. For high-traffic areas or pet runs, increase this to 150mm to prevent rutting.
Is sand a good sub base for artificial grass?
Sand alone is poor because it lacks cohesion and washes away easily. However, sharp sand mixed with a stabilizer or used as a 25mm top layer over crushed stone is excellent. It provides a smooth, cushioned surface for the turf to rest on.
Do I need a geotextile membrane?
Yes, absolutely. A breathable geotextile membrane prevents weeds from growing through your grass while allowing water to pass through. It also separates the soil from the aggregate, preventing the base from sinking into the mud below.
Can I use old concrete rubble as a sub base?
Yes, if it’s crushed into small, uniform pieces (MOT Type 1 grade). Large chunks of concrete create uneven surfaces and voids. Ensure the rubble is free of wood, plastic, or organic matter, which can decompose and cause settling.
Next Steps for Your Installation
Ready to start? First, measure your area accurately. Order about 10% more material than you calculate to account for waste and leveling adjustments. Rent a plate compactor-you’ll regret trying to tamp it down by hand. And finally, check the weather forecast. You want dry conditions for excavation and compaction. Rain turns your site into a mud bath, making it impossible to achieve a solid base.
If you’re unsure about the soil type in your garden, dig a test hole. Clay-heavy soils retain water and may require a deeper base or additional drainage pipes. Sandy soils drain well but shift easily, needing robust edging. Know your ground, choose the right stone, and compact it thoroughly. Do that, and your artificial lawn will stay green, flat, and functional for years.