Soil Pest Treatment Planner
⚠Step 1: Identify the Culprit
Select the organism you found in your soil inspection:
Root Maggot
Tiny white/yellow legless grubs. Plants wilt despite water.
High RiskFungus Gnats
Adults fly around pots; larvae are transparent worms with black heads in top inch of soil.
Moderate RiskWireworms
Hard, brown, shiny cylindrical larvae. Tunnels found in potatoes/onions.
High RiskNematodes
Microscopic roundworms. Visible as knotted/swollen roots (galls).
High RiskEarthworm
Pink/brown segmented worm. Aerates soil and cycles nutrients.
BeneficialSpringtail
Tiny jumping insect. Eats decaying matter and fungal spores.
Beneficial📋Step 2: Select Your Strategy
You pull a plant from your garden bed, expecting healthy white roots. Instead, you find tiny white worms wriggling in the dirt or dark beetles hiding near the stem. It’s a gardener’s nightmare. The question isn’t just how to kill them; it’s how to make sure the soil is truly safe for your next planting season. Soil pest control is the practice of identifying and managing harmful organisms living within the growing medium to protect plant health. But here is the hard truth: completely bug-free soil is rare, and often unnecessary. The goal is balance-eliminating destructive pests while keeping the helpful workers alive.
Many gardeners reach for harsh chemicals first, but that approach often backfires. It kills the good guys too, leaving your soil vulnerable to future invasions. Instead, we need a strategy based on detection, prevention, and targeted removal. This guide will walk you through exactly how to inspect your soil, identify what you’re dealing with, and choose the right method to clear it out without ruining your garden’s ecosystem.
Identifying the Culprits: Friend or Foe?
Before you treat anything, you need to know who lives in your dirt. Not all bugs in the soil are enemies. In fact, some are essential for nutrient cycling. The problem arises when specific pests overpopulate and attack plant roots directly.
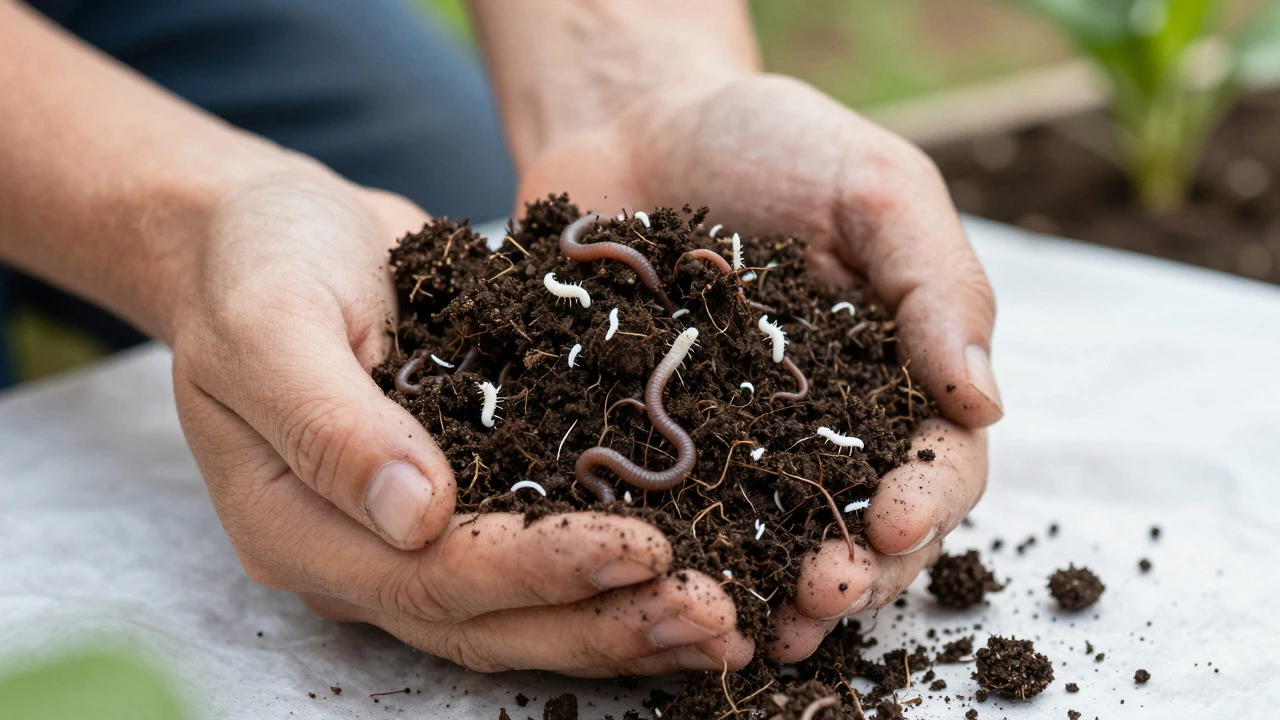
Start by digging up a small sample of soil (about 6 inches deep) near a struggling plant. Place it on a white sheet of paper or tray. Let it sit for an hour. Many pests will move to the surface as they dry out, making them easier to spot. Look for these common offenders:
- Root Maggots: These look like tiny, legless white or yellowish grubs. They chew on roots, causing plants to wilt and die. They are particularly fond of carrots, onions, and brassicas.
- Fungus Gnats: You’ll see the adults flying around potted plants, but the larvae live in the top inch of moist soil. They feed on organic matter and fine root hairs, stunting growth.
- Wireworms: Hard, brown, cylindrical larvae that bore into tubers and bulbs. If you cut open a potato or onion and see tunnels, wireworms are likely the cause.
- Nematodes: Microscopic roundworms. You can’t see them with the naked eye, but their damage shows up as knotted, swollen roots (galls). Root-knot nematodes are a major issue in warm climates.
Contrast these with beneficial creatures. Earthworms create channels for air and water. Springtails eat decaying organic matter and fungal spores. Predatory mites hunt other pests. If you see these, don’t panic-they are signs of healthy, active soil.
The Inspection Phase: How to Check Your Soil
Visual inspection is only part of the puzzle. To really understand what’s happening underground, you need a more systematic approach. This is especially important if you are reusing potting mix or preparing a new raised bed.
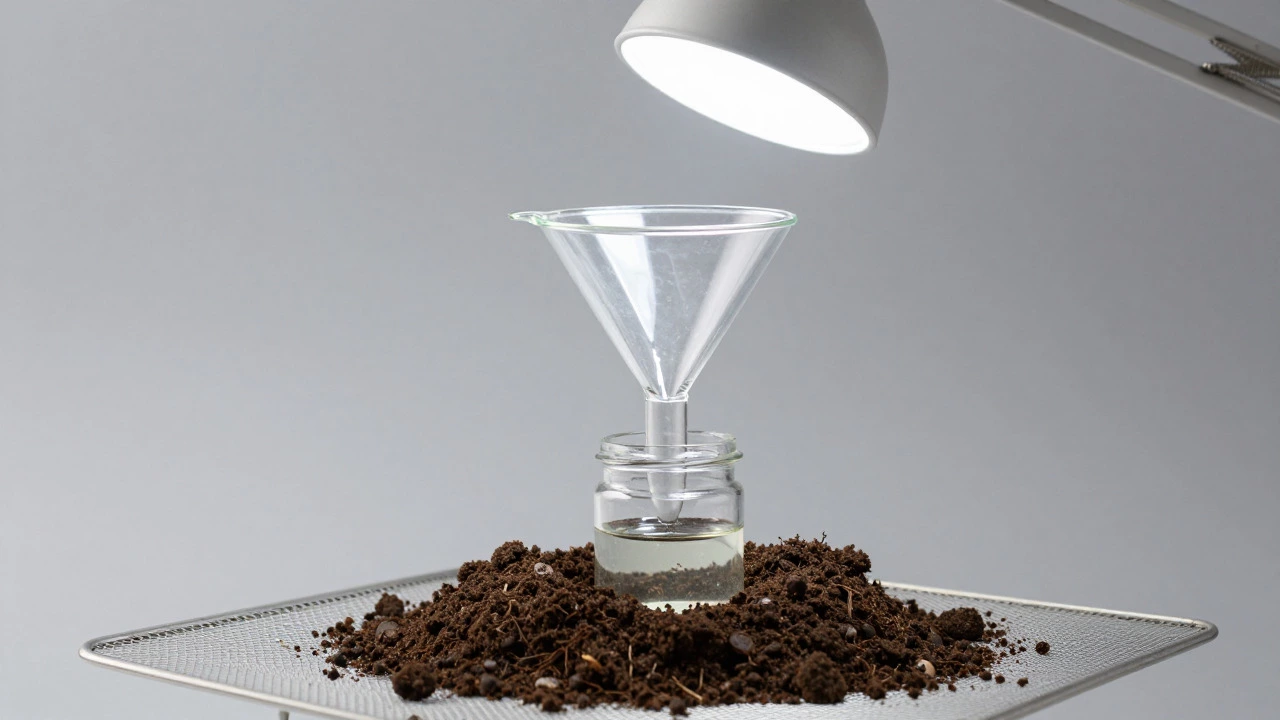
One effective technique is the "Berlese Funnel" method, which you can DIY at home. Take a bucket, place a funnel inside, and put a mesh screen at the bottom of the funnel. Fill the space above the screen with your soil sample. Shine a bright light (like a desk lamp) onto the top of the soil. As the soil dries and heats up, insects and mites will crawl downward to escape the heat, falling through the mesh into a container below filled with rubbing alcohol. This allows you to count and identify the inhabitants accurately.
For a quicker check, use the "Soil Sift" method. Spread a handful of soil on a black plastic bag. The contrast makes most insects visible. Look for movement. If you see nothing after ten minutes, try adding a little water. Some pests, like fungus gnat larvae, become more active when moisture is present.
| Organism | Appearance | Damage Type | Benefit/Risk |
|---|---|---|---|
| Root Maggot | Small, white/yellow grub | Chews roots, wilts plants | Risk: High |
| Fungus Gnat Larva | Transparent worm with black head | Eats root hairs, spreads disease | Risk: Moderate |
| Earthworm | Pink/brown segmented worm | Aerates soil, cycles nutrients | Benefit: High |
| Springtail | Tiny, jumping insect | Eats decaying matter | Benefit: Moderate |
| Wireworm | Hard, brown, shiny larva | Borers into tubers/bulbs | Risk: High |
Sterilization Methods: Killing Everything in the Soil
If you have a severe infestation, or if you are reusing old potting mix that smells sour or looks moldy, you might need to sterilize the soil. Sterilization kills everything-pests, diseases, weed seeds, and beneficial microbes. Use this method sparingly, primarily for container gardening or seed starting mixes where precision matters.
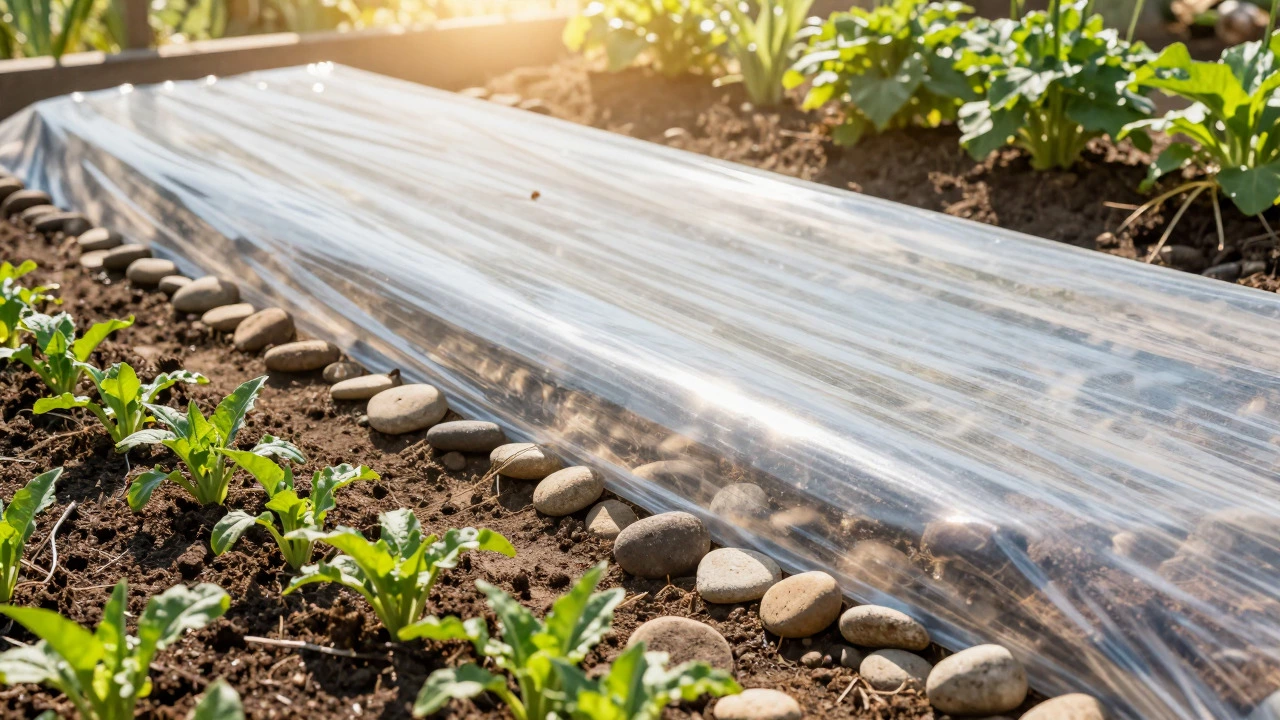
Heat Treatment (Solarization): This is the most eco-friendly way to pasteurize soil. Lay down clear plastic sheeting over wet soil in your garden bed or in trays. Secure the edges with rocks. Leave it for 4-6 weeks during the hottest part of summer. The sun heats the soil to temperatures exceeding 120°F (49°C), killing most pests and pathogens. For smaller amounts of potting mix, you can bake it in the oven at 180°F (82°C) for 30 minutes. Monitor closely to avoid burning the organic matter.
Boiling Water: Pouring boiling water over soil is a quick fix for small pots or cracks in pavement. It shocks and kills surface-dwelling pests and eggs. However, it doesn’t penetrate deeply, so it’s not effective for large beds. Also, be careful not to scald nearby desirable plants.
Chemical Fumigation: While effective, chemical fumigants are rarely recommended for home gardeners due to safety risks and environmental impact. They require protective gear and strict application rules. Reserve this for professional agricultural settings unless absolutely necessary.
Biological Controls: Using Nature to Fight Nature
Killing every bug is often counterproductive. A better long-term strategy is introducing natural predators that keep pest populations in check. This is known as biological control.
Beneficial Nematodes: These microscopic worms are sold commercially and are harmless to humans, pets, and plants. When applied to moist soil, they seek out and infect specific pests like root maggots, fungus gnat larvae, and white grubs. Once inside the host, they release bacteria that kill the pest within 48 hours. Apply them in the evening when the soil is cool and moist for best results.
Steinernema carpocapsae: This specific strain of nematode targets fungus gnats and leatherjackets. It’s highly effective because it hunts actively rather than waiting for prey. Mix the nematodes with water and pour them onto the soil surface. Keep the soil moist for two weeks to allow the nematodes to work.
Predatory Mites: Species like Hypoaspis miles (now called Stratiolaelaps scimitus) live in the soil and feed on fungus gnat larvae, thrips pupae, and moth eggs. They are excellent for indoor gardens and greenhouses where ventilation is limited.
Cultural Practices: Preventing Future Infestations
The best way to ensure your soil stays relatively pest-free is to make it an inhospitable environment for pests while supporting plant health. This involves cultural practices that disrupt the life cycle of common garden invaders.
- Crop Rotation: Many soil pests are host-specific. Root maggots love carrots and onions. If you plant carrots in the same spot year after year, the maggot population builds up. Rotate crops by family. Move brassicas to a different bed each season to break the cycle of cabbage root fly larvae.
- Proper Drainage: Fungus gnats thrive in soggy, anaerobic soil. Ensure your pots have drainage holes and your garden beds have good structure. Adding coarse sand or perlite to heavy clay soils improves airflow and dries out the top layer faster, discouraging gnat egg-laying.
- Sanitation: Remove dead plant debris immediately. Rotting leaves and stems provide food and shelter for pests. Clean up fallen fruit and vegetables, as they attract flies and beetles that lay eggs in the soil.
- Healthy Compost: Only add fully composted material to your soil. Fresh manure or hot compost can introduce weed seeds and pest eggs. Proper composting reaches temperatures high enough to kill most pathogens and pests before you even spread it.
Organic Treatments for Active Infestations
If you’ve identified a pest and want to reduce numbers without full sterilization, organic treatments offer a middle ground. These methods target specific pests while minimizing harm to beneficial organisms.
Neem Oil: Neem oil contains azadirachtin, which disrupts the hormonal system of insects, preventing them from molting and reproducing. Mix neem oil with water and a mild soap, then spray the soil surface and lower leaves. It works well against fungus gnats and aphids that drop to the soil to pupate.
Diatomaceous Earth (DE): DE is made from fossilized algae. Its sharp edges cut the exoskeletons of soft-bodied insects, causing them to dehydrate and die. Sprinkle a thin layer of food-grade DE on the soil surface. It must be dry to work, so reapply after watering or rain. Note: DE also harms beneficial insects, so use it selectively.
Hydrogen Peroxide Solution: A mixture of one part 3% hydrogen peroxide to four parts water can be poured onto the soil. It releases oxygen, which suffocates anaerobic pests like fungus gnat larvae and nematodes. It also helps aerate the soil and suppresses fungal diseases. Use this sparingly, as excessive oxygen can shock sensitive plant roots.
When to Call in the Professionals
Most home garden issues can be resolved with the methods above. However, some situations require expert intervention. If you suspect root-knot nematodes, testing kits are available, but treatment options are limited. Resistant crop varieties are your best bet. For severe wireworm infestations in vegetable patches, trapping with buried potato slices can help monitor levels, but complete eradication may take years.
If you are starting a new lawn or large landscape project, consider having a professional soil test done. Labs can identify specific pest pressures and recommend tailored management plans. This is especially useful in regions with unique soil types or climate challenges.
How do I know if my soil has bugs?
Look for signs like wilting plants despite adequate water, yellowing leaves, or visible holes in roots. Dig up a small section of soil and place it on a white sheet. If you see moving larvae, grubs, or beetles, you have pests. A Berlese funnel setup can help extract hidden insects for closer inspection.
Is it bad to have bugs in the soil?
Not necessarily. Many soil organisms like earthworms and springtails are beneficial. The problem is specific pests like root maggots or fungus gnats that damage plant roots. Aim for a balanced ecosystem rather than sterile soil.
Can I reuse potting soil with bugs?
Yes, but you should sterilize it first. Bake the soil in an oven at 180°F (82°C) for 30 minutes or solarize it under clear plastic for several weeks. This kills pests and pathogens before reintroducing the soil to your garden.
What kills fungus gnats in soil naturally?
Beneficial nematodes (Steinernema carpocapsae) are highly effective. You can also use a hydrogen peroxide solution (1:4 ratio with water) to suffocate larvae. Keeping the top inch of soil dry between waterings prevents adult gnats from laying eggs.
Does boiling water kill all soil bugs?
Boiling water kills surface-dwelling pests and eggs but does not penetrate deeply into the soil. It is effective for small containers or cracks but less so for large garden beds. It also kills beneficial microbes, so use it judiciously.