Artificial Grass Installation Health Check
Answer these key questions to see if your installation is at risk of the "Fatal Flaws" mentioned in the article.
Select the items you have completed to see the risk analysis for that specific step.
Quick Summary: The Biggest Red Flags
- Skipping the sub-base: Laying grass directly on soil or old grass is a recipe for disaster.
- Ignoring the pile direction: If you don't align the blades, your lawn will look two different colors.
- Poor drainage: Without a porous base, water pools on the surface, leading to mold and smells.
- Weak joints: Using too little glue or tape creates gaps that peel up over time.
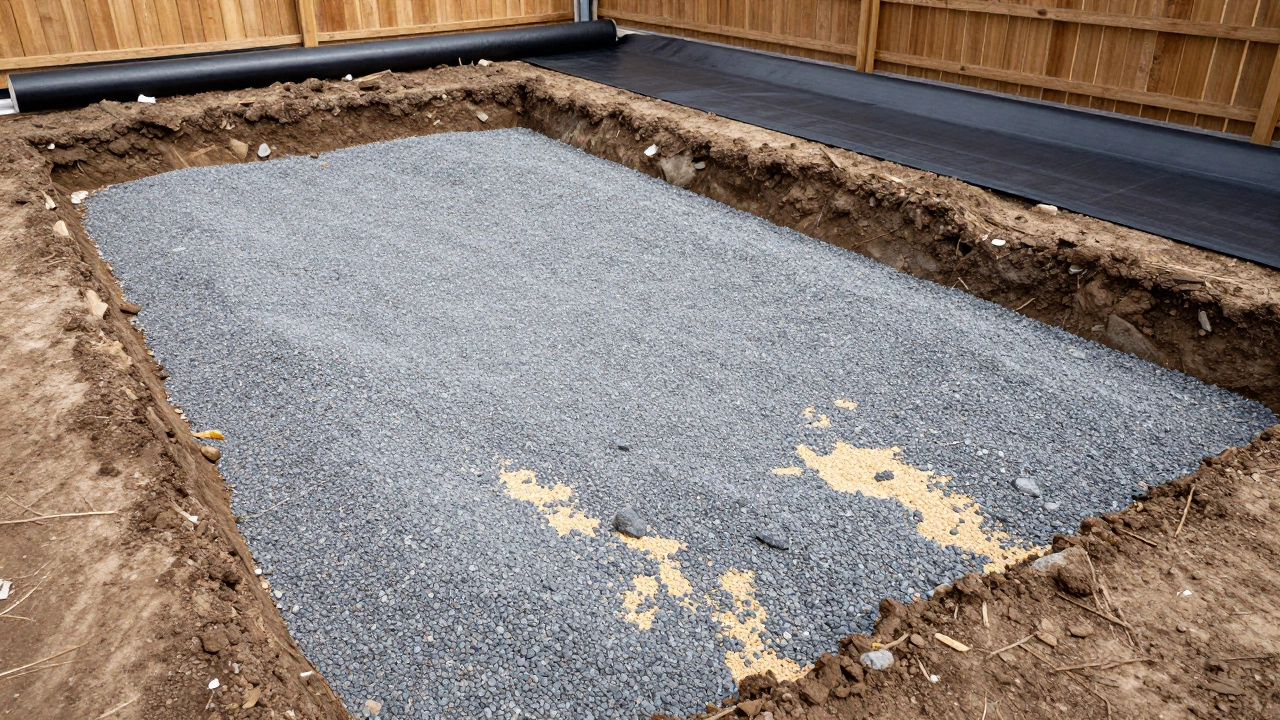
The Fatal Flaw: Skipping the Sub-Base
The biggest mistake people make is thinking they can just roll Synthetic Turf over their existing lawn. It sounds fast, but it's a nightmare waiting to happen. If you don't remove the old grass and dig out a few inches of soil, your new lawn will follow the uneven contours of the ground. Within a few months, you'll have dips and lumps that look terrible and feel weird underfoot.
You need a proper base. Most pros use a mix of crushed stone or MOT Type 1 (a crushed rock material) and a layer of sharp sand. This creates a stable, compacted platform. If you just put it on soil, the ground will shift as it rains and dries, causing the grass to sag. Think of it like building a house; you wouldn't put a living room on top of a swamp, so don't put your luxury turf on top of soft mud.
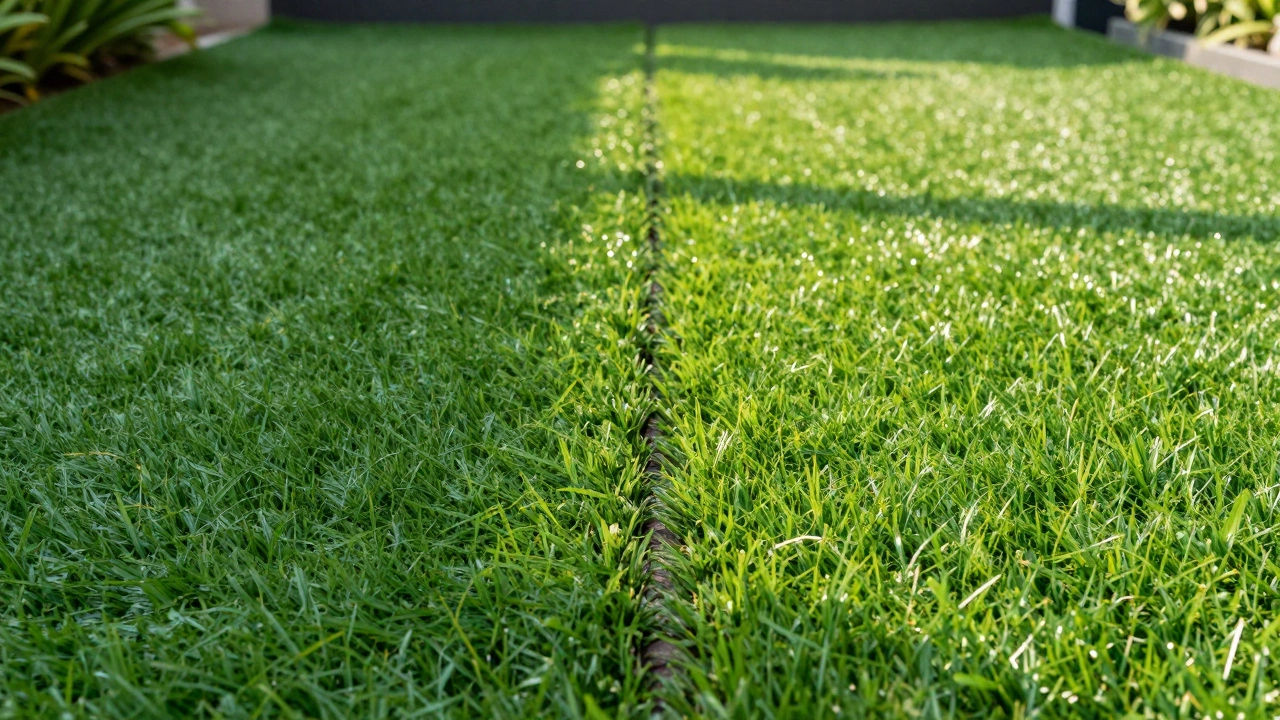
The 'Two-Tone' Effect: Pile Direction Disaster
Have you ever noticed how a real lawn looks different colors depending on which way you look at it? Artificial grass does the same thing because the blades are angled. This is called the "pile direction." The wrong way to lay it is to put two different rolls side-by-side without checking that the blades are all leaning the same way.
If you ignore this, you'll end up with a visible seam where one section looks dark green and the other looks light green. You can't fix this once the grass is glued down. The rule of thumb is to always lay the pile facing toward your house or the main viewing point of the garden. This makes the lawn look more natural and lush from the place you spend the most time.
Water Traps and Drainage Nightmares
A common myth is that because the grass is plastic, water just disappears. In reality, water has to go somewhere. If you don't use a permeable sub-base, water will sit in the sand or soil underneath, creating a stagnant pond. This leads to a damp smell, algae growth, and in some cases, the grass actually floating up during a heavy downpour.
To avoid this, ensure you have a slight gradient-about 1%-sloping away from your house. Use a Geotextile Membrane, which is a fabric layer that separates the soil from the stone base. This prevents the stone from sinking into the mud while still letting water pass through. If you're installing in a particularly wet area, you might even need a dedicated drainage pipe system underneath the base.
| Material | Best Use Case | Pros | Cons |
|---|---|---|---|
| MOT Type 1 | Main foundation layer | Extremely stable, doesn't shift | Heavy to move, needs compaction |
| Sharp Sand | Final leveling layer | Smooth finish, easy to level | Can wash away if not contained |
| Rubber Mulch | Play areas/Soft zones | High impact absorption | More expensive, less structural |
Seams and Edges: Where the Quality Shows
The wrong way to join two pieces of grass is by using a tiny bit of glue and hoping for the best. Over time, footsteps and pets will pull at those seams, creating gaps that let weeds grow through from below. You want a seamless look, which means using a high-quality Jointing Tape and a generous amount of specialized adhesive.
Another frequent error is neglecting the perimeter. If you just lay the grass up to the edge of a concrete patio without securing it, the edges will curl up. Use galvanized u-pins or perimeter nails every 30cm to lock the edges into the ground. This prevents the "curling carpet" effect that makes a professional job look like a cheap DIY project.
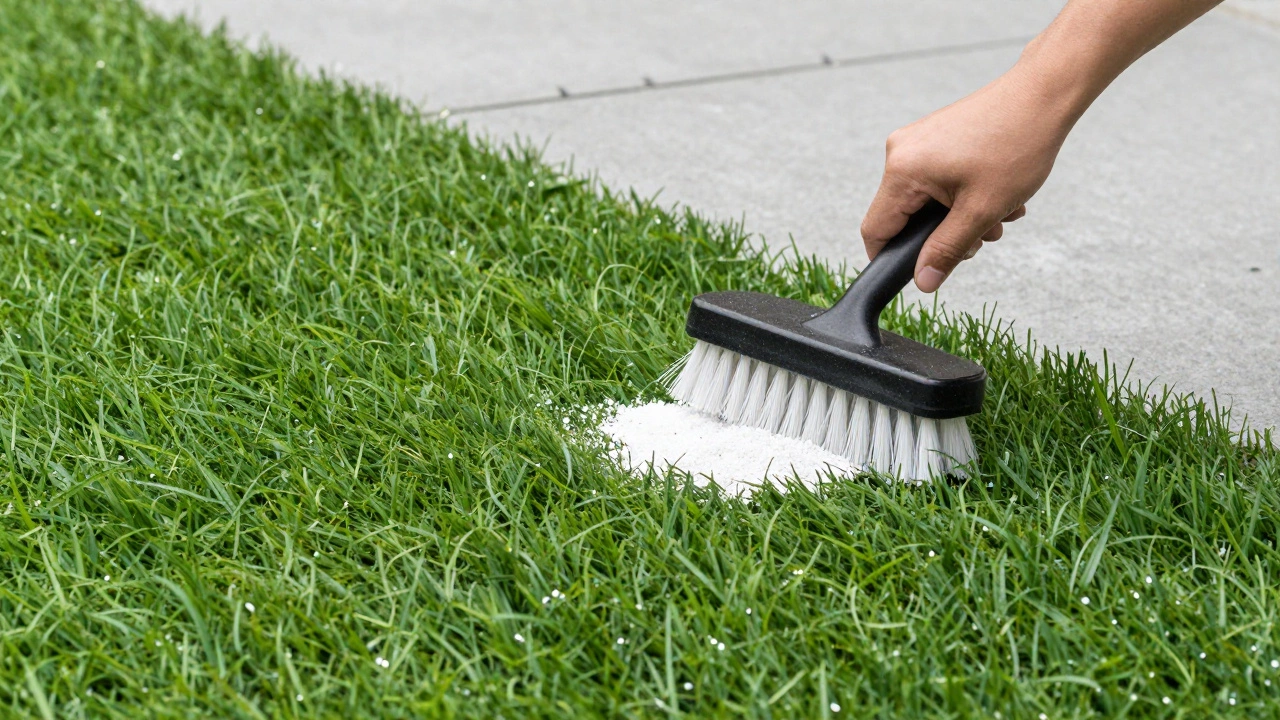
The Finishing Touch: Forgetting the Infill
Some people think the silica sand or rubber crumb that comes with some grass is optional. It isn't. If you leave the grass without infill, the blades will flatten out under the weight of furniture or people walking on it. The infill acts like a spring, pushing the blades back up and keeping them upright.
But there's a wrong way to do this too. Dumping a whole bag of sand in one spot and raking it in haphazardly creates clumps. The right way is to spread it evenly across the surface and then use a stiff brush or a power brush to work the grains down into the base of the fibers. This not only keeps the grass standing but also adds weight to the lawn, preventing it from shifting or bubbling.
How to Tell if Your Installation is Failing
If you've already laid your grass and you're worried you did it the wrong way, look for these signs. First, check for "pooling." After a rainstorm, does the water sit on top for hours? That's a drainage failure. Second, look for "puddling" or soft spots. If you step on the lawn and it feels like you're walking on a sponge, your sub-base wasn't compacted enough.
Finally, check the seams. If you see a gap wide enough to fit a coin, your adhesive is failing. While you can't easily fix a bad sub-base without ripping everything up, you can often fix seams by carefully lifting the edge and reapplying glue. However, the most expensive mistakes are always the ones hidden underground.
Can I lay artificial grass on top of a concrete patio?
Yes, but you can't just put it straight on the concrete. Concrete doesn't absorb water, so you'll end up with huge puddles. You should use a specialized drainage mat or a thin layer of permeable grit to ensure water can flow toward the edges and away from the center.
How do I fix a ripple in my artificial lawn?
If the ripple is caused by the grass being too loose, you can sometimes pull it taut and add more pins. However, if the ripple is caused by the ground underneath shifting, the only permanent fix is to lift the grass, re-level the sub-base with more MOT Type 1 or sand, and relay the turf.
Does the direction of the grass really matter that much?
Absolutely. Because the blades are designed to lean, they reflect light differently. If one section is laid facing north and the other south, the seam will look like a bright line cutting through your garden. Always ensure all rolls are laid in the same direction.
What is the best way to stop weeds coming through the fake grass?
The best defense is a high-quality weed membrane laid under your sub-base. However, weeds can still grow from seeds that land on top of the grass. For these, a quick spray of a systemic weedkiller or pulling them by hand is the only way. Don't use a heavy-duty herbicide that could melt the plastic fibers.
Is a power brush necessary for the infill?
While you can use a stiff plastic broom, a power brush is much more effective. It vibrates the silica sand deep into the thatch of the grass, which provides better support for the blades and prevents the sand from simply sitting on the surface where it can be easily brushed away.
Next Steps for a Perfect Lawn
If you're just starting, your first move should be a site survey. Check where the water naturally flows in your garden during a storm. If you have a low spot, you'll need to add more fill to that area before laying your membrane. For those who have already installed their grass and are seeing issues, start by testing the drainage. Pour a bucket of water on the surface; if it doesn't disappear within a few minutes, you likely have a compaction or drainage problem.
For a long-term maintenance plan, avoid using oil-based cleaners or harsh chemicals on the surface, as these can degrade the plastic polymers. Instead, use a leaf blower or a vacuum on a low setting to keep debris out of the pile, which prevents the infill from becoming clogged and dirty.