No-Dig Flower Bed Calculator
Calculate Your Flower Bed Materials
Enter your bed dimensions and plant spacing to get precise material estimates for the no-dig method
Your Results
Key Recommendations
- ✅ Use 6-8 inch compost layer
- ✅ Overlap cardboard edges completely
- ⚠️ Avoid plastic sheeting
Want a beautiful flower bed but feel overwhelmed by the idea of digging, planning, or buying expensive tools? You’re not alone. Most people think flower beds require hours of hard labor and perfect soil. But the truth? The easiest way to make a flower bed doesn’t involve a single shovel. In fact, you can have a blooming bed in under a weekend-with zero digging.
Forget digging: the no-dig method works better
The old way of making a flower bed-tilling the soil, removing grass, adding compost, leveling it all out-sounds good on paper. But in practice, it’s messy, tiring, and often unnecessary. Especially if you’re starting on grass or weeds. Instead, try the no-dig method. It’s used by professional gardeners across the UK, and it’s perfect for beginners.
Here’s how it works: cover the area with cardboard or thick newspaper, then pile on top of it a 6- to 8-inch layer of compost, topsoil, or a mix of both. The cardboard smothers the grass and weeds underneath. Over time, it breaks down, and earthworms turn it into rich soil. Meanwhile, your plants grow in fresh, loose material above.
This method cuts your setup time from days to hours. No back strain. No sod removal. No waiting for soil to settle. You can plant right away. Even in late winter, like now in January 2026, you can lay down the base and be ready for spring blooms by March.
Choose your materials wisely
Not all compost is the same. For the easiest and most effective flower bed, use well-rotted garden compost or mushroom compost if you can find it. Mushroom compost is often sold in bags at garden centers and is already rich in nutrients, slightly alkaline, and perfect for most flowering plants. It’s also lighter than regular topsoil, so it’s easier to move.
If you don’t have access to compost, buy a bagged multi-purpose compost from a local garden store. Avoid cheap potting mixes-they’re made for containers, not beds. They dry out too fast and don’t hold nutrients well.
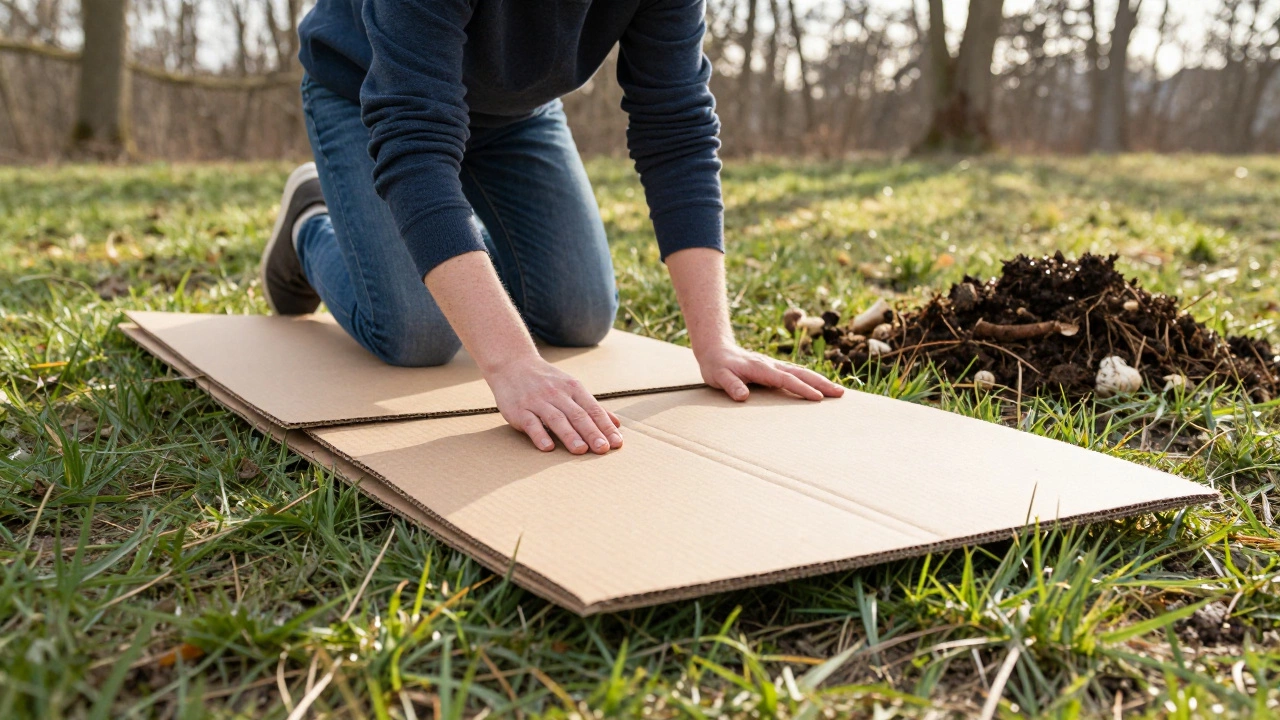
For the base layer, use plain cardboard (no glossy printing or tape) or 8-10 layers of newspaper. Cardboard is better because it’s thicker and lasts longer under rain. Tear it into pieces so it fits your space. Overlap the edges like puzzle pieces to block all light. No gaps means no weeds.
Shape your bed for easy access
Don’t make your flower bed too wide. If you can’t reach the middle without stepping in it, you’ll compact the soil and crush your plants. Aim for 4 feet wide max. That way, you can easily reach from both sides. Length? Doesn’t matter. Go as long as your space allows.
Keep the edges simple. Use bricks, wooden sleepers, or even large stones to define the border. You don’t need to buy fancy edging. Old bricks from a shed work fine. If you’re not into borders, just let the compost mound naturally slope down. It looks natural and requires zero work.
Place your bed where it gets at least 6 hours of sun a day. Most flowering plants-like marigolds, petunias, or cosmos-need that much. If your spot is shady, pick plants that like it: impatiens, begonias, or foxgloves.
Plant right on top
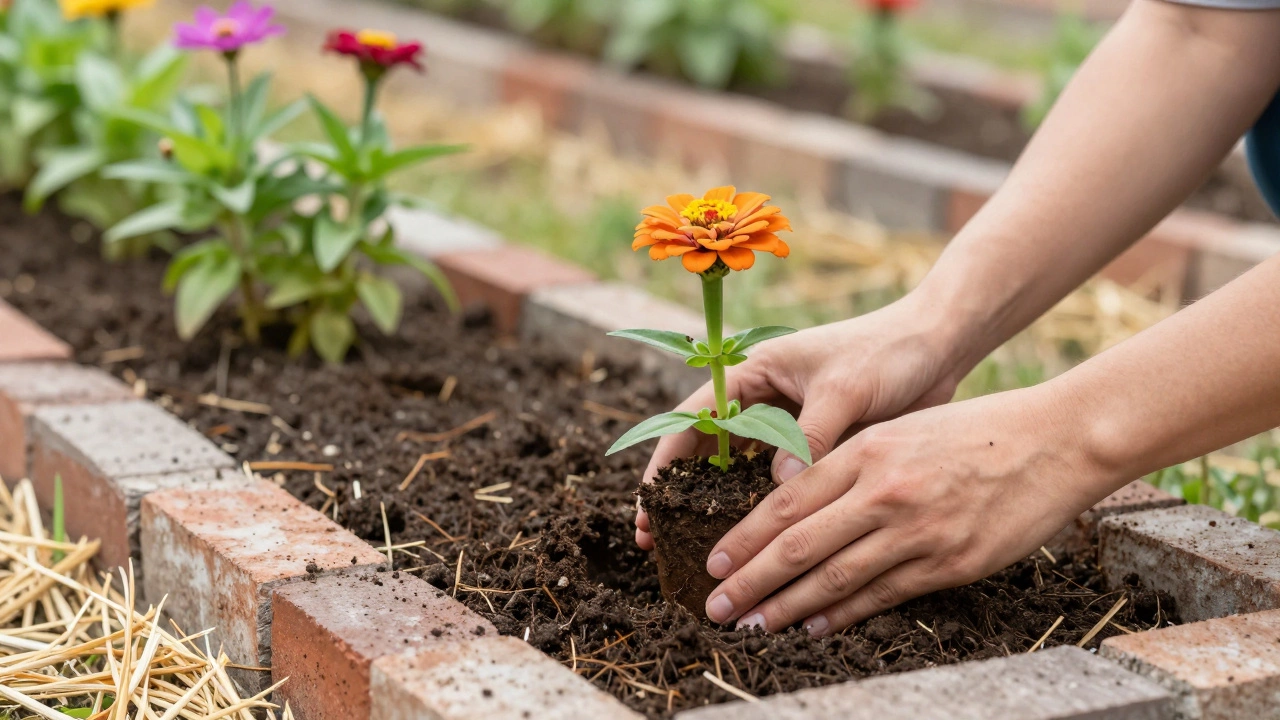
Once your layer of compost is down, you can plant immediately. No waiting. No soil conditioning. Just dig a small hole with your trowel or even your fingers, pop in the plant, firm the soil around it, and water.
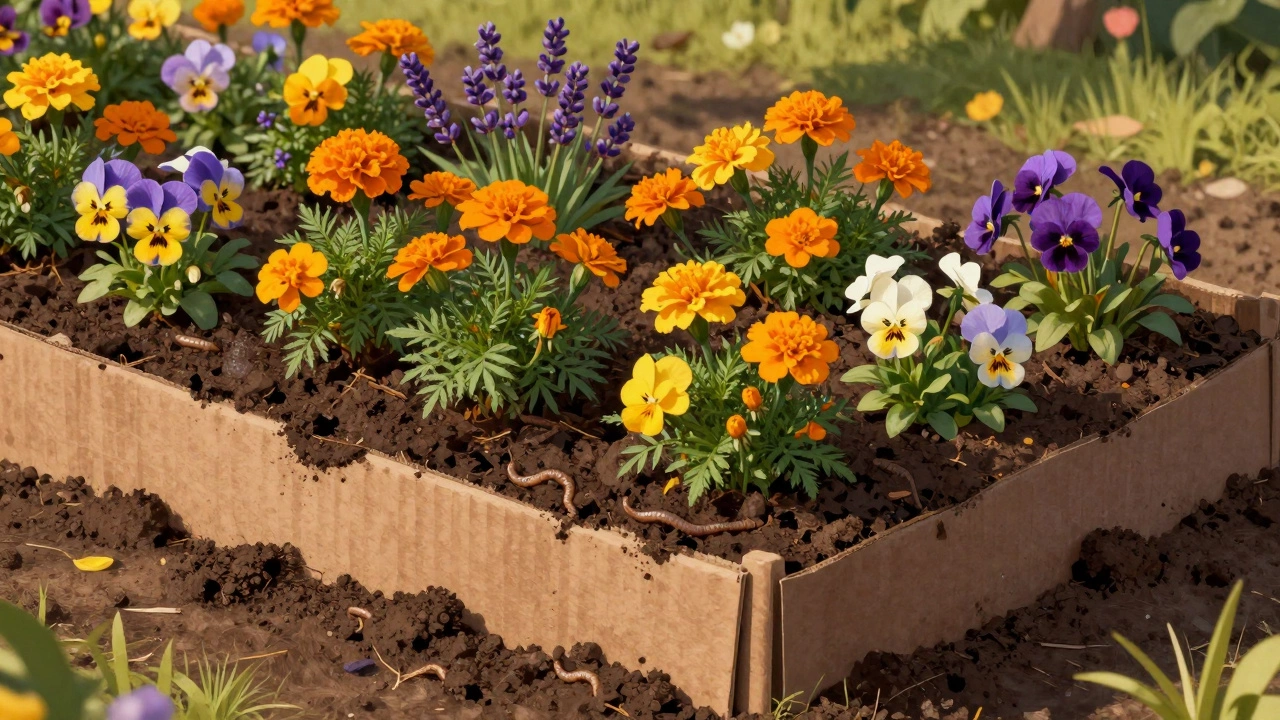
Start with easy plants for beginners: marigolds, zinnias, pansies, or lavender. They’re tough, bloom for months, and don’t need constant care. Buy small plants in pots from a garden center. They establish faster than seeds and give you instant color.
If you’re planting in late winter, go for hardy perennials like primroses or heuchera. They’ll survive frost and come back next year. Annuals like petunias can wait until April, when the frost risk drops.
Watering and maintenance: keep it simple
After planting, give everything a good soak. Don’t just sprinkle the surface-soak the soil down to 4 inches. That encourages roots to grow deep.
For the first few weeks, water every 2-3 days if it doesn’t rain. After that, let nature take over. The thick compost layer holds moisture like a sponge. You might not need to water again until summer.
Keep weeds out by adding a 1-inch layer of mulch on top after planting. Use bark chips, straw, or even shredded leaves. Mulch stops weeds, keeps the soil cool, and breaks down slowly to feed the plants.
That’s it. No fertilizing needed for the first season. The compost already has enough food. Just deadhead spent flowers (pinch them off) to keep blooming all summer.
Why this beats traditional methods
Traditional flower beds require you to kill grass, turn soil, wait weeks for it to settle, then add amendments. You risk bringing up weed seeds from below. You might end up with uneven ground or compacted soil.
The no-dig method skips all that. You’re building upward, not fighting downward. The soil underneath improves naturally. You don’t disturb the ecosystem. Earthworms and microbes do the work for you.
Plus, it’s cheaper. You’re not buying expensive soil mixes or renting equipment. A few bags of compost and some cardboard cost under £30 for a 4x6-foot bed. That’s less than a single potted shrub at a garden center.
Common mistakes to avoid
Don’t use plastic sheeting. It doesn’t break down. It traps moisture and kills soil life. Cardboard is the only safe base.
Don’t use fresh grass clippings or manure on top. They’re too hot and can burn plants. Wait until they’re aged or composted.
Don’t make the bed too narrow. A 2-foot-wide bed is hard to work in. Stick to 4 feet.
Don’t plant too close. Give each plant room to grow. Crowding leads to disease and poor blooms. Check the spacing on the plant tag.
Don’t forget to water after planting. Even if it’s cold, roots need moisture to start growing.
What to plant next spring
Once your bed is established, here are the easiest flowers to grow in the UK:
- Marigolds-bright orange or yellow, bloom all summer, repel pests
- Pansies-survive frost, come in rainbow colors, perfect for early spring
- Zinnias-tall, bold blooms, attract butterflies
- Lavender-fragrant, drought-tolerant, blooms in June
- Cosmos-feathery leaves, daisy-like flowers, self-seeds
- Heuchera-colorful leaves, great for shady spots
Plant them in groups of 3-5 for impact. Mix heights: put tall ones like cosmos at the back, low ones like pansies at the front.
Next steps: your 3-day plan
Here’s how to do it in three days, even if you’ve never gardened before:
- Day 1: Clear the area. Cut tall grass short. Lay down cardboard or newspaper. Overlap edges. Water it lightly to hold it in place.
- Day 2: Add 6-8 inches of compost. Use a rake to level it. If you’re using bags, stack them and cut the tops open to pour. No need to mix.
- Day 3: Plant your flowers. Water well. Add a thin layer of mulch. Done.
You’ll have a flower bed ready for spring blooms in less time than it takes to watch a movie.
Final thought: beauty doesn’t need complexity
Flower beds aren’t about perfection. They’re about joy. The easiest way to make one is the way that works for you-without stress, without tools, without guilt. The no-dig method gives you color, life, and a sense of accomplishment without the grind.
Start small. One bed. One weekend. Then watch what happens when you stop fighting the ground-and start building on it instead.